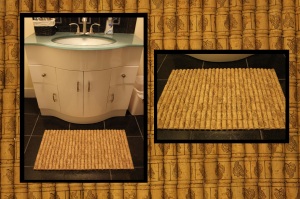
Bow-Tie

Overview of Project:

Over the past year, I have gotten into swing dancing. I wanted to dress up a bit when I go but I found that normal ties got in the way when I was dancing. I thought I’d try out bow-ties! I could not find any in stores that weren’t clip on so I thought I would try and make one. This is a sewing project that I spent just under $3 on (just the cost of the fabric and interfacing).

IMG_4250.JPG


What You’ll Need:

  • 1/2 a yard of a 42″ wide fabric ($2.10)
  •  9″ of Craft-Fuse Pellon ($0.75)
  • Sewing machine and supplies
  • Thread
  • Iron and ironing board
  • Thin wooden stick (a wooden spoon will do)

Total Project Budget = $2.85

How to Do It Yourself:

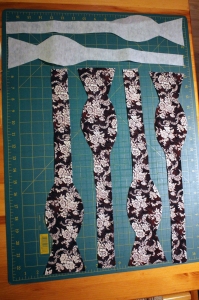
  1. Print a bow-tie template, cut it out and tape the two pieces together. Here is a bow-tie patter that I developed while making my bow-ties: Bow-Tie Pattern
  2. Use the template to cut out 4 pieces in the fabric of your choice, and 2 pieces in the pellon interfacing.   Note that when cutting out the fabric, you must cut on the bias. This means you have to cut in the direction that the material stretches (a 45 degree angle).
    IMG_4210

    Make sure to cut on the bias.

    IMG_4213

    Cut the template shape out to make 2 pieces of interfacing and 4 pieces of fabric.

  3. For this entire project, 1/4 inch seams are used. Sew the ends of two fabrics together IMG_4226
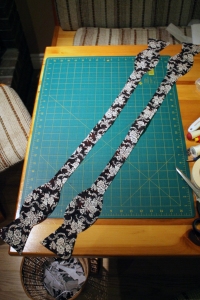
  4. Iron the interfacing onto the inside of one of these pieces.

    IMG_4223

    Iron on the interfacing onto the wrong side of one of the pieces.

  5. Pin the two pieces together with the correct sides of the fabric facing each other.

    IMG_4229

    Pin the two pieces together with the correct sides facing in.

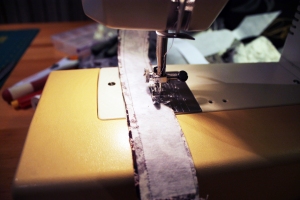
  6.  Sew around the edges (again with a 1/4″ seam) leaving a 3 to 4 inch gap in the middle of the bow-tie.
    IMG_4230

    Do not sew between the pencils along one edge of the bow-tie (about 3-4 inches).

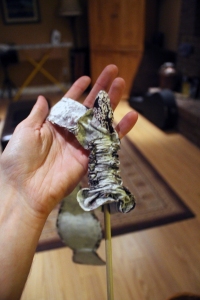
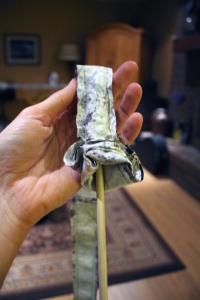
  7. IMG_4231Now we have to turn the bow-tie inside out so the correct side of the fabric is visible. This can be done using a thin rod and following the instructions in the photos below (I used a piece of dowelling). Place the end of the rod in the middle edge of the “fish tail” end of the bow-tie. Next, roll the bow-tie over itself pushing the rod further inside.IMG_4239
    IMG_4241

    Continue pushing the bow-tie over itself until the end with the rod emerges out of the gap that you did not sew along the middle.

    IMG_4242

    You will now be able to pull the one side of the bow-tie all the way inside out so the correct side of the material is now facing outward. Repeat the same thing with the other side of the bow-tie.

  8. Your bow-tie is going to look pretty terrible at this point. But a pointed object (I used a chop stick) can be used to poke out the corners of the bow-tie. The bow-tie can now be ironed flat. IMG_4243IMG_4245
  9. Now, the last step is to close the hole you left in the back of the bow-tie where you turned it inside out. Take some time and fold the edges in nicely and simply top-stitch along the gap.IMG_4247


The Finished Product:

IMG_4248

Comments:

I enjoy making these bow-ties because they are fairly simple and don’t take too much time. The longest part is cutting out the material. It also took me a while to learn how to properly tie a bow-tie but once you have it down pat, it is fairly simple, YouTube is a great resource for this!

IMG_4252


Queen Anne’s Bar

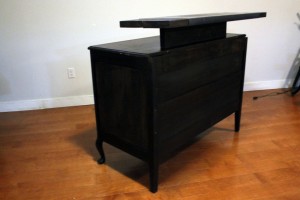
In the summer of 2014, I found an antique Queen Anne style dresser on the side of the road; it couldn’t stand up by itself and it had a hole in one of the side panels. After I repaired it, it stood sturdy once again. I then decided I wanted to convert it into a bar.

IMG_2536

The final product.

IMG_2497

The final product.

IMG_2499

The final product.

What I Used:

  • Antique dresser
  • 1/8″ wood sheet
  • Wood glue
  • 2×6
  • 2×8
  • Wood dowels
  • 3-inch wood screws
  • Sheet metal
  • Wood stain
  • Varnish
  • Clear tremclad rust paint

Directions:

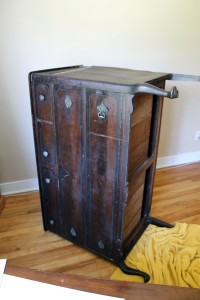
  1. When I got the dresser off the side of the road, it was very rickety and had a hole in the side panel; I had to do some repair work so it could stand up on its own. To do this, I took the dresser apart and inserted a new side panel, I then glued all of the joints and I put it back together and clamped the dresser to let it dry.

    095

    Found on the side of the road.

  2. The top of the dresser was very rough, had many stains on it, and was tarnished. To refinish it, I simply sanded it down with a belt sander, applied 3 coats of wood stain, and 2 thick coats of varnish.

    IMG_2169

    In the midst of refinishing the top and the side panel I had to replace.

  3. Typically, the top of a bar is 42″ off the ground. My design was to join 2-4 foot lengths of 2×8 side by side to make a 14″ wide bar top. Then to  use a 2×6 to give the bar top some height above the dresser. After all was said and done, the bar top was 42.25″ from the ground.

    IMG_2543

    The final product.

  4. Like I mentioned in step 3, I made the bar top by joining 2-4 foot lengths of 2×8 side-by-side. I bought a 2×8 piece of lumber that was 8 feet in length. I cut this piece in half and took a belt sander to the entire thing to really clean it up and get it looking really smooth. I then drilled 7 holes the size of wood dowels (bought from home depot) along one side of each of the pieces; these holes must be in the exact same position on each of the pieces.

    IMG_2132

    While drilling the holes for the wood dowels, I used 4 drill bit sizes.

  5. After the holes for the dowels were drilled, I glued the dowels into one piece, put glue along the ends that would be joint together, then hammered the pieces together. I then clamped it and let it dry over night.
    IMG_2142

    I used dowels and wood glue to join the 2×8’s together.

    IMG_2144

    After I hammered the sides together, I clamped them together and let them dry over night.

  6. For the piece of lumber that the bar top would be sitting on, I took a 2×6 piece of lumber, cut it to my desired length, and took a belt sander to the entire thing.
  7. I then attached this piece to the bar top by gluing it and screwing it through the top of the bar.
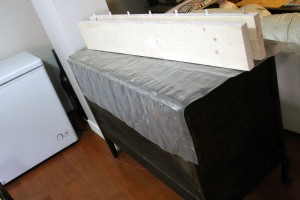
  8. Once this bar top addition was constructed, I brought it to a metal supplier and got a piece of 16 gauge sheet metal cut and bent so it could slide over top and wrap around the underside of the bar top. I typically do not spend much money on my DIY projects but decided to make an exception for this project. Buying this sheet metal and getting it bent cost about $80.
    20150709_224230

    I wrapped sheet metal around the bar top leaving the timbers exposed 6-inches on either end.

    IMG_2500

    The sheet metal wrap.

  9. Before I slid the sheet metal around the bar top, I finished it in the same way as the top of the dresser: applied 3 coats of wood stain, and 3 coats of varnish.

    IMG_2168

    Staining the bar top and riser.

  10. Once I finished the bar top attachment, I attached it to the dresser by gluing and screwing it from the inside of the dresser.

    11846092_10153540989574936_880184833_n

    I had to get inside the dresser to drill the holes to fasten the bar top to the dresser from the inside.

The Finished Product:

IMG_2498

I found 2 bar stool at a garage sale.

Comments:

I am happy with how this project turned out. I got the inspiration for wrapping the bar top in sheet metal when I was in Niagara-on-the-Lake doing wine tastings. Many of the wineries had their bars wrapped in copper sheets. I am currently a student so buying enough copper to wrap my entire bar top was not an option as this would have cost about $300.

This project was a long time in the making but I am really happy with how it turned out.

IMG_2527

IMG_2530

Ready to be served!

IMG_2515

Concrete Table

I had been wanting to try a project involving concrete for a while and when I found this end table base on the side of the road I knew it was a perfect fit! It was solid wood and sturdy enough to support a heavy concrete top. I have a lot of work to do to learn how to make the concrete smoother in future projects but I am happy with how this one turned out!

IMG_1915

The finished product

What You’ll Need:

  • Table base (found on side of the road)
  • 1 bag of concrete ($3)
  • wood to make the form (scrap)
  • water shield multi-surface water proofer (had extra from a previous project)
  • Chalk board paint ($7)
  • paint brush

Directions:

  1. Make a wooden concrete form of your desired size. I used a wood board that had a white hard board finish on the outside but if you are using normal lumber, you may want to spray some oil coating on it or something so you can easily remove the form.

    092

    My brother was visiting me so he got to help out with this project! He is cutting the wood for the form.

  2. Mix and pour the concrete into the form. Before I did this, I placed pennies in the bottom of the form so I would have some sort of interesting feature set into the top of my table.
    088

    Mixing the concrete

    084

    Making sure the concrete is as smooth as possible

  3. Repeatedly dab a piece of wood into and out of the concrete in the form to try and remove as many air bubbles as possible. I also set a couple smaller pieces of wood into the bottom of the concrete so I can use them to attach to the base in the future.

    Time to let the concrete top set

    Time to let the concrete top set

  4. Let the concrete set for the suggested time on the bag of mix.
  5. After it is done setting, sand the edges, clean off all of the loose pieces and dust, and then apply a coating of water proofer. Before I added the water-shield, I tried to use a parging mix to fill in the bug holes and make the top smooth. However, when I vacuumed the top off before applying the water-shield, most of the parging ended up coming off. I need to experiment more and try to figure out an effective method of finishing the concrete.  IMG_1907
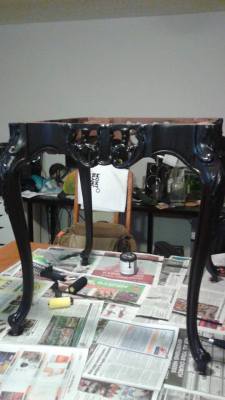
  6. You may also choose to apply a new finish to your base. I painted mine with black chalk board paint because I like the finish that that type of paint gives.
The base with the new finish

The base with the new finish

Comments In the end, I am happy with how this project turned out. I currently just have the top sitting on the base. In the future I would like to try and make a new top with a better method of finishing the concrete. Any advice would be greatly appreciated!

The finished product

The finished product

If you have any questions, comments feel free to leave them below; and if you decide to try this project yourself, I would love to hear how it turned out!

Wood Pallet Trunk

I haven’t posted in a while because I was going through the end-of-term, exams, and start of a summer job transition but here is a project I completed that is one of my favourites and is not a project that I planed but was totally based on a unique piece of furniture that I found on a whim.

20150513_172943

One day, when I was driving to the grocery store, I passed an old decrepit trunk that was covered in something that seemed to be woven straw that was deteriorating. There was a bunch of water damage but I was able to salvage all of the hardware and the frame of the lid.

944658_10151641197704936_289858345_n

Now that I had all of the hardware I needed to make a trunk and a lid, all I needed to make was the main compartment. I pretty much always have wood pallets lying around ready to be used for something so I decided to make use of them for this project.

IMG_1892IMG_1895

I went to good-old Home Depot and bought a couple 1″x2″ lengths of lumber for a couple dollars each and made a wooden frame for the body of the chest.

IMG_1880

I then cut the wooden slats I salvaged from the pallets to the correct length so they could run vertically around the chest. I also incorporated some new lumber I had lying around my house to have a variation in the colours of wood around the trunk.

970642_10151645107199936_851125943_n

Like in the wood pallet table I have a post about already, I used roofing nails to attach the vertical slats to the frame to give the trunk a more industrial/rustic look with more exposed hardware. After the frame was assembled and the vertical slats were attached, I finished it off with a couple coats of wood stain leaving the inside of the trunk unstained.

To breathe new life into the lid, I covered it with some brown faux leather and attached the hardware back onto it.

379666_10151646767804936_257403821_n

To remove some force from the hinges when the lid is open, I attached some chains to bear most of the weight when the trunk is open.

IMG_1879

The final project cost me about $7 of new material and can be used to store blankets or clothes, be used as a coffee table, or even a bench to sit on!

IMG_1890

This project is more difficult to duplicate exactly because it was based on a unique piece of furniture that I found but if you decide to try a project like it, I would love to hear how it turned out! If you have any questions or comments feel free to leave them below.

Pallet Table

Overview of Project:

This is a project that I did about 2 years ago. It  It had a total budget of about $12.

1017255_10151657517154936_1845201954_n

What You’ll Need:

  • 2 wood pallets
  • 1 box of roofing nails ($4)
  • 1 quart of wood stain ($8)
  • Crowbar
  • Hammer

Total Project Budget = $12

How to Do It Yourself:

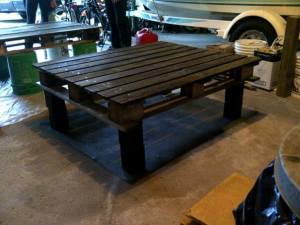
The amount of work you want to put into this project is flexible and totally up to you. I decided that the slats on the skid I had were too far apart so I took 2 slats from my extra skid and incorporated them into the pallet I used for the top of the table.

Below is a photo of the pallet I used for the top of my table after I incorporated the 2 extra slats. What I did was leave the two end and the middle plank on and removed the others. I then added one additional plank to each side to make the gaps smaller. I also used roofing nails to attach the planks because I wanted the nail to be a noticeable feature of the top.

395304_10151641197269936_874078414_n

After you are happy with the pallet you are using for the top, you can sand it so it is smooth or leave it forsegas a more rustic feel. I choose to leave mine as it was.
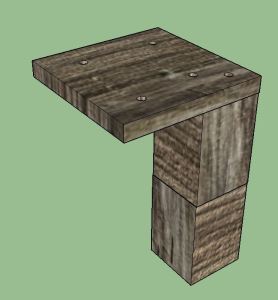
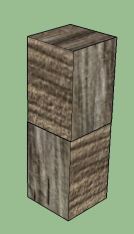
I wanted to make the legs removable so I had to come up with a system that allowed the legs to be unscrewed somehow. I took apart my spare skid and used 8 4″x4″ blocks that were on the inside as the legs of the table. I toe-nailed and glued the two blocks to each other end-to-end so they were taller and used these as legs.

I then cut a 8×8 piece of plywood and drilled holes in is as shown below.

a4he4h

From the top of the bracket shown above,  I screwed the leg into the two holes that are closer together. To attach the legs to the table, I screwed through the bracket from the bottom into the skid.

arhr

The legs can now be easily removed by taking out a few screws,

The last step in making the table is to stain or paint it the colour that you choose. I choose a dark wood stain. I first brushed on a layer of stain with a large paint brush then applied a thinner coating with a rag.

1000996_10151705221514936_1537005463_n


Cork Bath Mat

This is a fairly simple project that just requires some time.

What You’ll Need:010

  • 126 wine corks
  • xacto knife
  • non-adhesive shelf liner [$7]
  • cutting surface
  • hot glue gun

Directions:

  1. Cut each wine cork in half length-wise using an xacto knife. This is the longest part of the project, I sat in-front of my computer and watched Netflix for about 3 hours while doing this. 006 (2)
  2. The shelf liner that I got was not wide enough for the size of mat that I wanted to make so I cut 3 strips of it and hot glued them together with about a 1″ lap. In the photo below, you can see two seems near the centre of the mat.11082649_10153197086094936_4956454706822564056_n
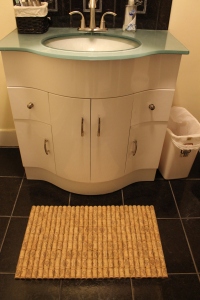
  3. Using the hot glue gun, glue the corks to the non-adhesive shelf liner. The mat that I made is 28 half-corks across and 9 half-corks down and measures 15.75″ by 26.25″.

bathmat

Closing Comments

I currently have the mat in-front of the sink in my basement bathroom. It is great because the bathroom floor is quite cold and this mat provides a nice surface to stand on. I have not tried it in a scenario where it gets wet like stepping on it when I get out of the shower because I am not sure if mould will start to grow on the shelf liner backing.

If you have any questions or comments feel free to leave them below; and if you decide to try this project yourself, I would love to hear how it turned out!

Happy creating!