Apple Butternut Squash Soup

I know the calendar says it is spring, but it is snowing here today in Canada’s Capital, Ottawa. Here is a recipe for delicious apple butternut squash soup to keep you warm on this snowy spring day.

I altered this recipe from simplyrecipes.com (see the link at the bottom of the post). This is a simple recipe that makes delicious soup. All you need to do is cut a bunch of things up and let it cook itself in a big pot! I got 8-10 servings from the batch that I made.

What You’ll Need:11079597_10153197473334936_8304311615895224235_n

  • 2 butternut squashes, peeled and chopped
  • 3 granny smith apples, peeled and chopped
  • 1 yellow onion, chopped
  • 2 celery stocks, chopped
  • 2 cups of chopped carrots
  • 4 tbs butter
  • 900 ml of chicken broth
  • 3.5 cups water
  • 1 chicken bouillon cube

How To Do It Yourself:

  1. In a large pot, melt the butter and saute the onion, celery, and carrots for 5 minutes.
  2. Add the squash, apple, chicken broth, water, and bouillon cube. Bring to a boil and simmer on medium for 30 minutes.
  3. Puree the soup in a blender.
  4. Season with nutmeg, cinnamon, salt and pepper to taste.

11081077_10153197473269936_6363876606253369511_n

http://www.simplyrecipes.com/recipes/butternut_squash_apple_soup/

Writing With Light

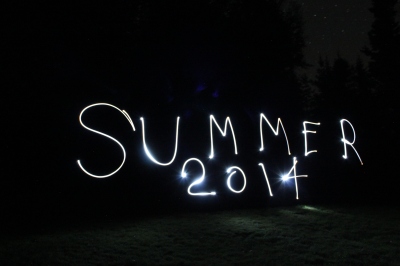
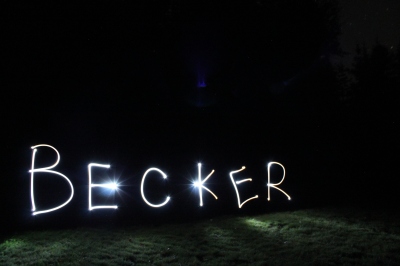
Here is a photography experiment that you can try this weekend! I did this experiment last summer and I am really happy with how it turned out. You can do anything from drawing cool designs to writing a message.

2015

What You’ll Need:

  • Camera that has the ability to change the exposure time, I used a Canon Rebel T3
  • Flashlight (or other light source)
  • Tripod

How To Do It Yourself:

For this project, you need it to be as dark as possible. I would suggest going out to a field in the country somewhere away form all of the city lights. I took these photos at my cottage. The set up is pretty straight forward and is easiest if you have someone to help you out taking the photos. Place the camera on a tripod and switch it to a long exposure. If you can find someone to help you with this experiment, you can put the exposure setting on BULB. This will allow the shutter to stay open as long as someone holds the trigger down which lets you to take your time writing a message. Just keep in mind that the longer the exposure is, the brighter the surroundings will be.

To take a photo, simply stand in front of the camera with a flashlight and while someone holds down the trigger, begin creating a design with the flashlight. A light trail will be left where ever the illuminated flashlight goes.

To create words, you have to write the letters backwards and turn the flashlight off between letters to create spaces.

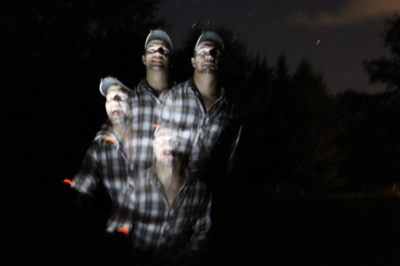
504 1622 1616 1625This is a really fun project to do on a warm summers night. You can even do it with a group of friends and experiment by including people in the photo! To capture people in the photo, you need to have some sort of light source illuminating them. Because the exposure is so long, you will only show up in the photo if you stay still for a few seconds; this allows you to capture people multiple times in one photo.

2262

2269

2256

Like always, if you have any questions or comments feel free to leave them below; and if you decide to try this project yourself, I would love to hear how it turned out!

Celestial Spray Paint

Overview946120_10151588952444936_344680308_n

I was first exposed to creating paintings with spray paint on youtube. After watching a few tutorials, I decided to try it for myself and I was quite happy with the results. This is a painting project that is quite simple and produces painting that look fairly impressive. It may take a few experiment paintings until you get the desired outcome; you do have to work quite fast while the paint is wet.

What You’ll Need:

  • Spray paint of your chosen colours
  • Round plates or lids that you don’t mind getting covered in paint
  • A painting surface (I used Bristol board)
  • A pallet knife
  • Old magazines (must have a glossy finish)
  • A piece of wood or cardboard to tape the painting surface to
  • Rubber gloves if you don’t want to get your hands covered in paint

11071078_10153197002614936_44965975657840272_n

How To Do It Yourself:

Preparation:

  1. Find a bunch of circular objects like lids from plastic containers, or old plates. These items will get covered in paint so don’t use your mom’s best china.
  2. If you cannot easily pick the plates up, super glue something (like a stone) to the bottom of it for you to grab onto.
  3. Cut a piece of Bristol board to your desired dimensions and tape it to a piece of wood or cardboard to give you a firm surface to paint on. (I put the tape on the back)

Before you begin painting, you have to think abut what you want to do because you need to paint it fairly quick; the paint can’t dry.

Main Concept:

These paintings are done in layer, covering up spaces that you want to preserve and removing layers to expose the colours beneath

Creating a Planet:

To create a planet you will need to choose a colour scheme of 2 or more colours. Spray these colours on your canvas in the general area that you want the planet to be located. Then, working while the paint is wet, take a glossy magazine page and dab the canvas to wipe off layers of paint.

This is the place where you can get creative, try smudging, blending, dabbing, or wiping the paint in different directions to get the desired texture. Once you are happy with the texture, use one of your circular covers and place it on your painting where you want your planet to be. Make sure you place it so just the rim is touching the paper (if you are using a plate, place it upside down on the canvas). You are now ready to create the surrounding landscape and background of your painting.

17604_10151738625984936_1956688831_n

Creating the Surrounding Landscape:

There are various methods of creating the landscapes surrounding your planets.

One option is to leave the planet in open space. To do this, while the cover is still over the planet, spray the entire canvas black. You can also use white to speckle stars onto the painting. I think this actually looks fairly realistic if you paint your planet white, grey, and black to create a moon and just spray the background black. I have done just a simple moon and a black background and I think it turned out really well; it would make a good post card. For that one I just used a 4×6 glossy photo paper as a canvas.

Another option you have for a surrounding a simple cave-wall or mountain texture. To achieve this texture, while the planet is covered, spray a few lighter colours around the canvas and end with a coat of black. Use a pallet knife to remove the black paint in various locations revealing the layers of colour below. Below is a painting I did with a single planet and a cave-wall texture around it.

1002105_10151738621359936_756660105_n

The possibilities are endless with what you can do, below is a painting I did that has multiple planets, mountain textures, a city and a bridge. To make the cityscape, I used a similar method to the mountain texture I described above. You spray on multiple light colours then end with black. I then used a pallet knife to remove the black paint in the shape of a building or bridge.

999055_10151738626424936_69311772_n

Closing Comments:

I really enjoy doing these paintings because each one is unique and you never quite know how it is going to turn out until you are finished.

Like always, if you have any questions or comments feel free to leave them below; and if you decide to try this project yourself, I would love to hear how it turned out!

Cork Bath Mat

This is a fairly simple project that just requires some time.

What You’ll Need:010

  • 126 wine corks
  • xacto knife
  • non-adhesive shelf liner [$7]
  • cutting surface
  • hot glue gun

Directions:

  1. Cut each wine cork in half length-wise using an xacto knife. This is the longest part of the project, I sat in-front of my computer and watched Netflix for about 3 hours while doing this. 006 (2)
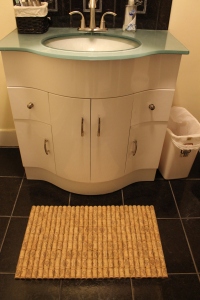
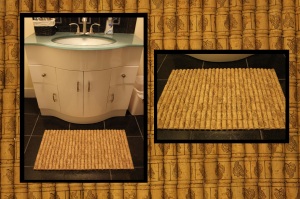
  2. The shelf liner that I got was not wide enough for the size of mat that I wanted to make so I cut 3 strips of it and hot glued them together with about a 1″ lap. In the photo below, you can see two seems near the centre of the mat.11082649_10153197086094936_4956454706822564056_n
  3. Using the hot glue gun, glue the corks to the non-adhesive shelf liner. The mat that I made is 28 half-corks across and 9 half-corks down and measures 15.75″ by 26.25″.

bathmat

Closing Comments

I currently have the mat in-front of the sink in my basement bathroom. It is great because the bathroom floor is quite cold and this mat provides a nice surface to stand on. I have not tried it in a scenario where it gets wet like stepping on it when I get out of the shower because I am not sure if mould will start to grow on the shelf liner backing.

If you have any questions or comments feel free to leave them below; and if you decide to try this project yourself, I would love to hear how it turned out!

Happy creating!

Hello world!

I am one of those people who you always see parked on the side of the road trying to fit a “good find” into their tiny hatchback vehicle. I am constantly bringing home old, weird items from the side of the road or a garage sale and giving them new life. A friend recently inspired me to start a blog to share all of the fixer-up and DIY projects I do.

So here it is! I will first be posting some projects that I have done this past year to give my blog some initial volume, then when spring actually arrives (there is still a lot of snow on the ground) I will be posting about projects that I currently have going on. I might also sprinkle in some recipes I have been cooking, some photography I have been shooting, or some bible verses I have been reading.

I hope you enjoy and get inspired by some of the things that inspire me!