Overview of Project:
Over the past year, I have gotten into swing dancing. I wanted to dress up a bit when I go but I found that normal ties got in the way when I was dancing. I thought I’d try out bow-ties! I could not find any in stores that weren’t clip on so I thought I would try and make one. This is a sewing project that I spent just under $3 on (just the cost of the fabric and interfacing).

What You’ll Need:
- 1/2 a yard of a 42″ wide fabric ($2.10)
- 9″ of Craft-Fuse Pellon ($0.75)
- Sewing machine and supplies
- Thread
- Iron and ironing board
- Thin wooden stick (a wooden spoon will do)
Total Project Budget = $2.85
How to Do It Yourself:
- Print a bow-tie template, cut it out and tape the two pieces together. Here is a bow-tie patter that I developed while making my bow-ties: Bow-Tie Pattern
- Use the template to cut out 4 pieces in the fabric of your choice, and 2 pieces in the pellon interfacing. Note that when cutting out the fabric, you must cut on the bias. This means you have to cut in the direction that the material stretches (a 45 degree angle).

Make sure to cut on the bias.
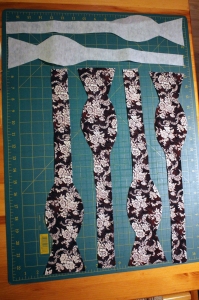
Cut the template shape out to make 2 pieces of interfacing and 4 pieces of fabric.
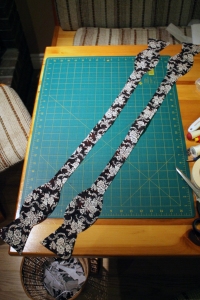
- For this entire project, 1/4 inch seams are used. Sew the ends of two fabrics together
- Iron the interfacing onto the inside of one of these pieces.

Iron on the interfacing onto the wrong side of one of the pieces.
- Pin the two pieces together with the correct sides of the fabric facing each other.

Pin the two pieces together with the correct sides facing in.
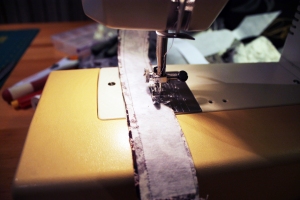
- Sew around the edges (again with a 1/4″ seam) leaving a 3 to 4 inch gap in the middle of the bow-tie.

Do not sew between the pencils along one edge of the bow-tie (about 3-4 inches).
 Now we have to turn the bow-tie inside out so the correct side of the fabric is visible. This can be done using a thin rod and following the instructions in the photos below (I used a piece of dowelling). Place the end of the rod in the middle edge of the “fish tail” end of the bow-tie. Next, roll the bow-tie over itself pushing the rod further inside.
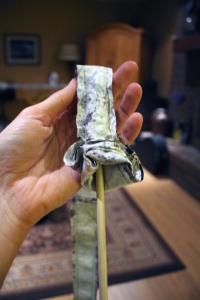
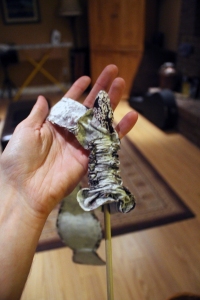
Continue pushing the bow-tie over itself until the end with the rod emerges out of the gap that you did not sew along the middle.

You will now be able to pull the one side of the bow-tie all the way inside out so the correct side of the material is now facing outward. Repeat the same thing with the other side of the bow-tie.
- Your bow-tie is going to look pretty terrible at this point. But a pointed object (I used a chop stick) can be used to poke out the corners of the bow-tie. The bow-tie can now be ironed flat.


- Now, the last step is to close the hole you left in the back of the bow-tie where you turned it inside out. Take some time and fold the edges in nicely and simply top-stitch along the gap.


The Finished Product:

Comments:
I enjoy making these bow-ties because they are fairly simple and don’t take too much time. The longest part is cutting out the material. It also took me a while to learn how to properly tie a bow-tie but once you have it down pat, it is fairly simple, YouTube is a great resource for this!

